Eclipse First Program: Your Step‑by‑Step Guide
Starting with Java in Eclipse is a great way to learn programming fundamentals. In this article you will walk through creating, compiling, and running your first Java project in the Eclipse IDE. The process is simple and mirrors what you see in the tutorial video, so you can follow along easily.
Why Eclipse?
Eclipse is a popular, open‑source IDE that supports Java, C/C++, and many other languages. Its project‑based structure, powerful refactoring tools, and extensive plug‑in ecosystem make it a favorite for both beginners and seasoned developers.
Prerequisites
- Java Development Kit (JDK) installed on your machine.
- Download and install Eclipse IDE for Java Developers from the official site.
- Optionally, subscribe to our Java Spring Boot AI Live Course and use coupon TELUSKO20 for 20% off.
Step 1 – Launch Eclipse and Create a New Java Project
Open Eclipse and select a workspace folder where your projects will live. Then:
- Click File > New > Java Project.
- Enter a project name, e.g., FirstEclipseProject.
- Leave the default JRE settings unless you need a specific Java version.
- Click Finish.
Eclipse will create a folder structure with a src directory ready for your code.
Step 2 – Add a New Class
Inside the src folder:
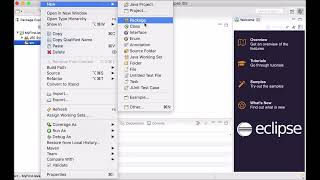
- Right‑click src and choose New > Class.
- Name the class FirstProgram and check the box for a main() method.
- Click Finish.
Your new file should look like this:
public class FirstProgram { public static void main(String[] args) { System.out.println("Hello, Eclipse!"); } }Step 3 – Compile and Run
Eclipse compiles automatically as you type, but to run the program manually:
- Right‑click the FirstProgram.java file.
- Select Run As > Java Application.
The console pane at the bottom will display:
Hello, Eclipse!Congratulations! You have successfully compiled and executed your first Java program in Eclipse.
Understanding the Workflow
In the video we covered the steps in a concise manner, but let’s break down the key concepts:
- Project – a logical grouping of source files and resources.
- Package – an optional namespace for organizing classes.