How to Create a Checklist in Google Sheets
Google Sheets offers a flexible way to build checklists that can be used for project tracking, daily routines, inventory management, or any task that benefits from a simple tick‑off system. Because the spreadsheet lives in the cloud, you can access it from any device, share it with teammates, and automate parts of the process with built‑in functions. Below is a step‑by‑step guide that walks you through creating a functional checklist, adding visual cues, and optionally automating unchecking or counting completed items.
Setting Up Your Sheet
Begin by opening a new Google Sheet. Give the file a descriptive name that reflects its purpose, such as “Weekly Content Calendar” or “Office Supply Inventory.” In the first row, add column headers that will organize your information. Typical headers for a checklist include:
- Item – the task or object you want to track
- Status – where the checkbox or indicator will live
- Due Date – optional, for time‑sensitive items
- Notes – any additional details or comments
Adjust column widths as needed so that text is fully visible. Freeze the header row (View → Freeze → 1 row) to keep it visible while you scroll through longer lists.
Adding Checkboxes
The simplest way to create a tick‑off box is to use the built‑in checkbox feature.
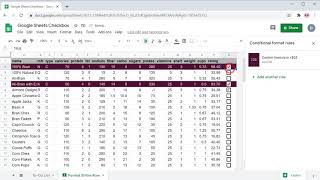
- Select the cells in the Status column where you want checkboxes to appear (e.g., B2:B100).
- From the menu, choose Insert → Checkbox.
- Google Sheets will insert an empty box in each selected cell. Clicking a box toggles it between checked (TRUE) and unchecked (FALSE).
If you prefer a different symbol, you can replace the default checkbox with a custom character using data validation (see the next section).
Using Data Validation for Custom Options
Sometimes you may want a dropdown with options like “Not Started,” “In Progress,” and “Done” instead of a plain checkbox. Data validation lets you create that list.



![How to Make a Checklist in Google Sheets | Add a Checkbox | Create a To-Do [Task] List](https://i.ytimg.com/vi/wmyTjlONcig/mqdefault.jpg)