Prek Winter Craft Ideas That Spark Creativity
When the temperature drops, the classroom or home can become a hub of colorful activity. Prek winter crafts give young learners the chance to explore textures, colors, and simple engineering concepts while celebrating the season. Below you’ll find a collection of safe, low‑mess projects that teachers and parents can set up in under an hour.
Why Winter Crafts Matter for Pre‑K Learners
Winter-themed projects support several early learning goals:
- Fine‑motor development – cutting, gluing, and pinching small pieces strengthen hand muscles.
- Vocabulary growth – words like “snowflake,” “icicle,” and “frost” become part of everyday language.
- Science observation – watching ice melt or salt react with water introduces basic cause‑and‑effect reasoning.
- Social skills – collaborative projects encourage sharing, turn‑taking, and cooperative problem solving.
Top 5 Easy PreK Winter Crafts
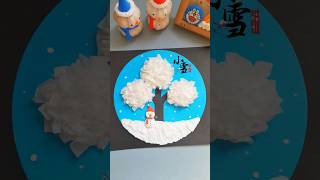
- Snowflake Cotton‑Ball Art – use cotton balls, white glue, and blue construction paper to create fluffy snow scenes.
- Salt Painting – sprinkle salt on wet watercolor paper, then watch the crystals sparkle as they dry.
- Paper Ice Skates – cut simple skate shapes from cardstock, add glitter “ice” and a paper “blade” for imaginative play.
- Bird‑Paper Collage – combine feather‑like tissue paper with black construction paper to make winter birds.
- Ear‑Bud Snowflakes – twist plastic ear buds into snowflake patterns and glue them onto a white background for a 3‑D effect.
Step‑by‑Step: Snowflake Cotton‑Ball Craft
This activity is a favorite on many preschool art channels, including the short video “Winter Art Idea for Preschool Teachers and Parents!” It requires only a few household items and yields a soft, tactile snow scene that children love to touch.
Materials Checklist- Blue or gray construction paper (10 × 10 in.)
- White cotton balls
- White glue or a glue stick
- Scissors (child‑safe)
- Optional: glitter, sequins, or small stickers for extra sparkle
- Prepare the base. Lay the construction paper flat on a table. If desired, draw a light horizon line with a pencil to separate sky from ground.
- Apply glue. Using a brush or glue stick, spread a thin layer of glue where each cotton ball will sit. Encourage children to practice spreading the glue evenly.
- Place cotton balls. Press a cotton ball onto the glued area, then gently roll it to flatten it into a fluffy “